PyPI package installation and usage
Using 3DMolMS through molnetpack requires minimal coding and is easy to use. You can use it for both inference with pre-trained models and for training your own models entirely in Python. If you prefer command-line scripts, please refer to the Source code setup page.
Installing from PyPI
3DMolMS is available on PyPI as the package molnetpack. You can install the latest version using pip:
pip install molnetpack
PyTorch must be installed separately. Check the official PyTorch website for the proper version for your system. For example:
pip3 install torch torchvision torchaudio --index-url https://download.pytorch.org/whl/cu124
Using molnetpack for MS/MS prediction
The sample input files, a CSV and an MGF, are located at ./examples/demo_input.csv and ./examples/demo_input.mgf, respectively. It’s important to note that during the data loading phase, any input formats that are not supported will be automatically excluded. Below is a table outlining the types of input data that are supported:
Item |
Supported input |
|---|---|
Atom number |
<=300 |
Atom types |
‘C’, ‘O’, ‘N’, ‘H’, ‘P’, ‘S’, ‘F’, ‘Cl’, ‘B’, ‘Br’, ‘I’ |
Precursor types |
‘[M+H]+’, ‘[M-H]-’, ‘[M+H-H2O]+’, ‘[M+Na]+’, ‘[M+2H]2+’ |
Collision energy |
any number |
To get started quickly, you can instantiate a MolNet and load a CSV or MGF file for MS/MS prediction using load_data function:
- molnetpack.MolNet.load_data(self, path_to_test_data)
Load input molecules from a CSV, MGF, or PKL file.
- Parameters:
path_to_test_data (str) – Path to the input file. Supported formats:
csv,mgf,pkl.
Then predict the MS/MS spectra using pred_msms function. The predicted MS/MS spectra will be saved in the specified path. The default format is MGF, but you can also save it as a CSV file by specifying the file name with a .csv extension.
- molnetpack.MolNet.pred_msms(self, path_to_results=None, path_to_checkpoint=None, instrument='qtof')
Predict MS/MS spectra for loaded molecules.
- Parameters:
- Returns:
DataFrame with columns ID, SMILES, Collision Energy, Precursor Type, Pred M/Z, Pred Intensity.
- Return type:
pandas.DataFrame
For example:
import torch
from molnetpack import MolNet, plot_msms

# Set the device to CPU for CPU-only usage:
device = torch.device("cpu")

# For GPU usage, set the device as follows (replace '0' with your desired GPU index):
# gpu_index = 0
# device = torch.device(f"cuda:{gpu_index}")

# Instantiate a MolNet object
molnet_engine = MolNet(device, seed=42) # The random seed can be any integer.

# Load input data (here we use a CSV file as an example)
molnet_engine.load_data(path_to_test_data='./examples/input_msms.csv')

# Predict MS/MS
pred_spectra_df = molnet_engine.pred_msms(instrument='qtof')
Plot predicted MS/MS
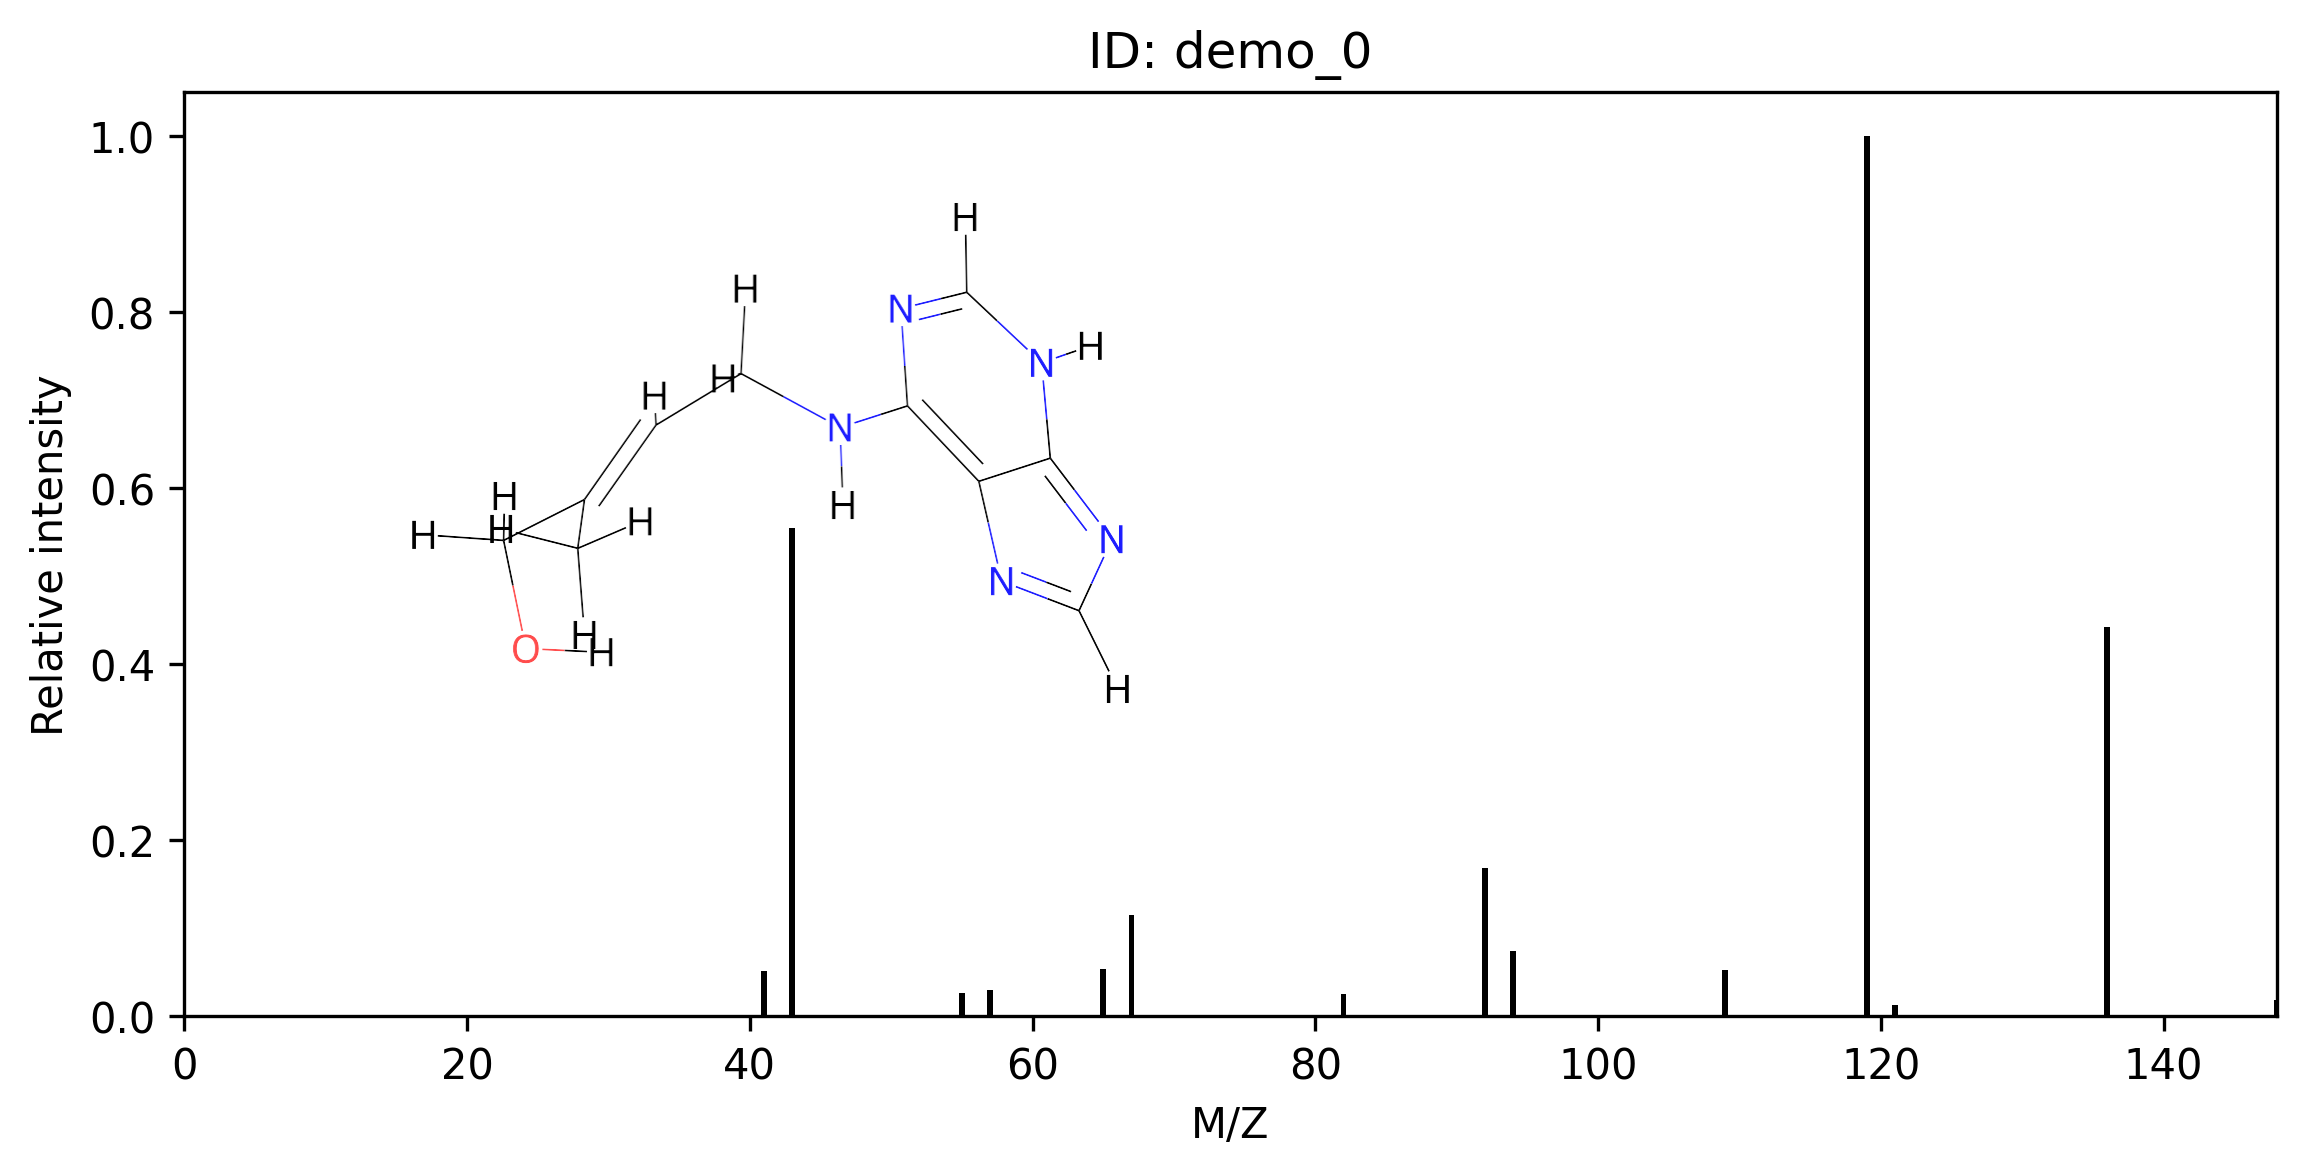
The predicted MS/MS spectra can be visualized using the plot_msms function:
- molnetpack.plot_msms(msms_res_df, dir_to_img)[source]
Plot MS/MS spectra with inset 2-D molecular structures.
- Parameters:
msms_res_df (pandas.DataFrame) – DataFrame returned by
MolNet.pred_msms().dir_to_img (str) – Directory where PNG files will be saved (one per spectrum).
You may customize the plot by updating the source code directory, such as the size of the image and the color scheme.
For example:
# Plot the predicted MS/MS with 3D molecular conformation
plot_msms(pred_spectra_df, dir_to_img='./img/')
Below is an example of a predicted MS/MS spectrum plot.
Using molnetpack for properties prediction
Before doing any prediction, please intantiate MolNet:
import torch
from molnetpack import MolNet

# Set the device to CPU for CPU-only usage:
device = torch.device("cpu")

# For GPU usage, set the device as follows (replace '0' with your desired GPU index):
# gpu_index = 0
# device = torch.device(f"cuda:{gpu_index}")

# Instantiate a MolNet object
molnet_engine = MolNet(device, seed=42) # The random seed can be any integer.
RT prediction
For RT prediction, please use pred_rt function after instantiating a MolNet object. Please note that since this model is trained on the METLIN-SMRT dataset, the predicted retention time is under the same experimental conditions as the METLIN-SMRT set.
- molnetpack.MolNet.pred_rt(self, path_to_results=None, path_to_checkpoint=None)
Predict retention times for loaded molecules.
For example:
# Load input data
molnet_engine.load_data(path_to_test_data='./examples/input_rt.csv')

# Pred RT
rt_df = molnet_engine.pred_rt()
CCS prediction
For CCS prediction, please use pred_ccs function after instantiating a MolNet object.
- molnetpack.MolNet.pred_ccs(self, path_to_results=None, path_to_checkpoint=None)
Predict CCS values for loaded molecules.
For example:
# Load input data
molnet_engine.load_data(path_to_test_data='./examples/input_ccs.csv')

# Pred CCS
ccs_df = molnet_engine.pred_ccs()
Molecular feature embedding
For saving the molecular embeddings, please use the following save_features function after instantiating a MolNet object.
- molnetpack.MolNet.save_features(self, checkpoint_path=None, instrument='qtof')
Extract encoder embeddings for loaded molecules.
For example:
# Load input data
molnet_engine.load_data(path_to_test_data='./examples/input_savefeat.csv')

# Inference to get the features
ids, features = molnet_engine.save_features()

print('Titles:', ids)
print('Features shape:', features.shape)
Training with molnetpack
MolNet supports training all task types (MS/MS, RT, CCS) directly from Python without using the command-line scripts.
- molnetpack.MolNet.train(self, task, train_data, valid_data, checkpoint_path='', resume_path='', transfer=False, precursor_type='All', use_scaler=False)
Train a model and store it on this MolNet instance.
After training the model is ready for immediate use via
pred_msms,pred_rt, orpred_ccs— no checkpoint reload needed.- Parameters:
task (str) – One of
'msms','rt','ccs'.train_data (str) – Path to training PKL file.
valid_data (str) – Path to validation PKL file.
checkpoint_path (str) – Where to save the best checkpoint. Empty string disables saving.
resume_path (str) – Resume from or transfer-learn from this checkpoint.
transfer (bool) – If
True, load only encoder weights fromresume_pathand freeze them.precursor_type (str) – Filter training data by precursor type (
msmstask only). One of'All','[M+H]+','[M-H]-'.use_scaler (bool) – Fit a StandardScaler on training targets (
rttask only).
- Returns:
Best validation metric achieved during training.
- Return type:
- molnetpack.MolNet.evaluate(self, test_pkl, pred_mgf, result_path='', plot_path='')
Compare predicted MS/MS spectra against ground-truth spectra.
- Parameters:
- Returns:
DataFrame with per-spectrum cosine similarity and metadata.
- Return type:
pandas.DataFrame
MS/MS model training
Fine-tune from a pretrained checkpoint:
import torch
from molnetpack import MolNet

device = torch.device("cuda:0" if torch.cuda.is_available() else "cpu")
molnet_engine = MolNet(device, seed=42)

best_cosine = molnet_engine.train(
    task='msms',
    train_data='./data/qtof_etkdgv3_train.pkl',
    valid_data='./data/qtof_etkdgv3_test.pkl',
    checkpoint_path='./check_point/molnet_qtof_etkdgv3_tl.pt',
    resume_path='./check_point/molnet_pre_etkdgv3.pt',
    transfer=True,
)

# The trained model is immediately ready for inference — no reload needed
molnet_engine.load_data('./examples/input_msms.csv')
pred_df = molnet_engine.pred_msms(instrument='qtof')
Evaluating predictions against ground truth:
results_df = molnet_engine.evaluate(
    test_pkl='./data/qtof_etkdgv3_test.pkl',
    pred_mgf='./result/pred_qtof_etkdgv3_test.mgf',
    result_path='./eval_qtof_etkdgv3_test.csv',
    plot_path='./eval_qtof_etkdgv3_test.png',
)
Retention time model training
Fine-tune from a pretrained MS/MS checkpoint using transfer learning:
import torch
from molnetpack import MolNet

device = torch.device("cuda:0" if torch.cuda.is_available() else "cpu")
molnet_engine = MolNet(device, seed=42)

best_mae = molnet_engine.train(
    task='rt',
    train_data='./data/metlin_etkdgv3_train.pkl',
    valid_data='./data/metlin_etkdgv3_test.pkl',
    checkpoint_path='./check_point/molnet_rt_etkdgv3_tl.pt',
    resume_path='./check_point/molnet_qtof_etkdgv3.pt',
    transfer=True,
    use_scaler=True,
)
CCS model training
Fine-tune from a pretrained MS/MS checkpoint:
import torch
from molnetpack import MolNet

device = torch.device("cuda:0" if torch.cuda.is_available() else "cpu")
molnet_engine = MolNet(device, seed=42)

best_mae = molnet_engine.train(
    task='ccs',
    train_data='./data/allccs_etkdgv3_train.pkl',
    valid_data='./data/allccs_etkdgv3_test.pkl',
    checkpoint_path='./check_point/molnet_ccs_etkdgv3_tl.pt',
    resume_path='./check_point/molnet_qtof_etkdgv3.pt',
    transfer=True,
)